

OWASP Android Uncrackables 1 & 2
by purpl3f0x
Intro
In the interest of working on my Android reverse engineering skills, I decided to work on some Android “crack me”s that I found at this Github repo. The first two are fairly simple so I’ve decided to write up both in one blog post just to keep it from being too short. I made sure to attempt to solve each with both static and dynamic analysis when it was possible, and I’ll be sharing the solutions I came up with.
Uncrackable 1
Objective: Find the secret string!
The first uncrackable asks us to find the secret string and enter it into a prompt to solve the challenge. Since this isn’t malware, I’m going to skip over checking the manifest, as it doesn’t have any clues to help me.
Static Analysis
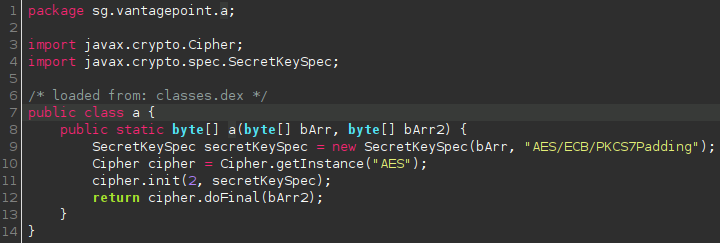
Opening the APK in jadx, I find there aren’t many classes to look over, and fairly quickly, I find code that looks like it is decoding and decrypting a string:
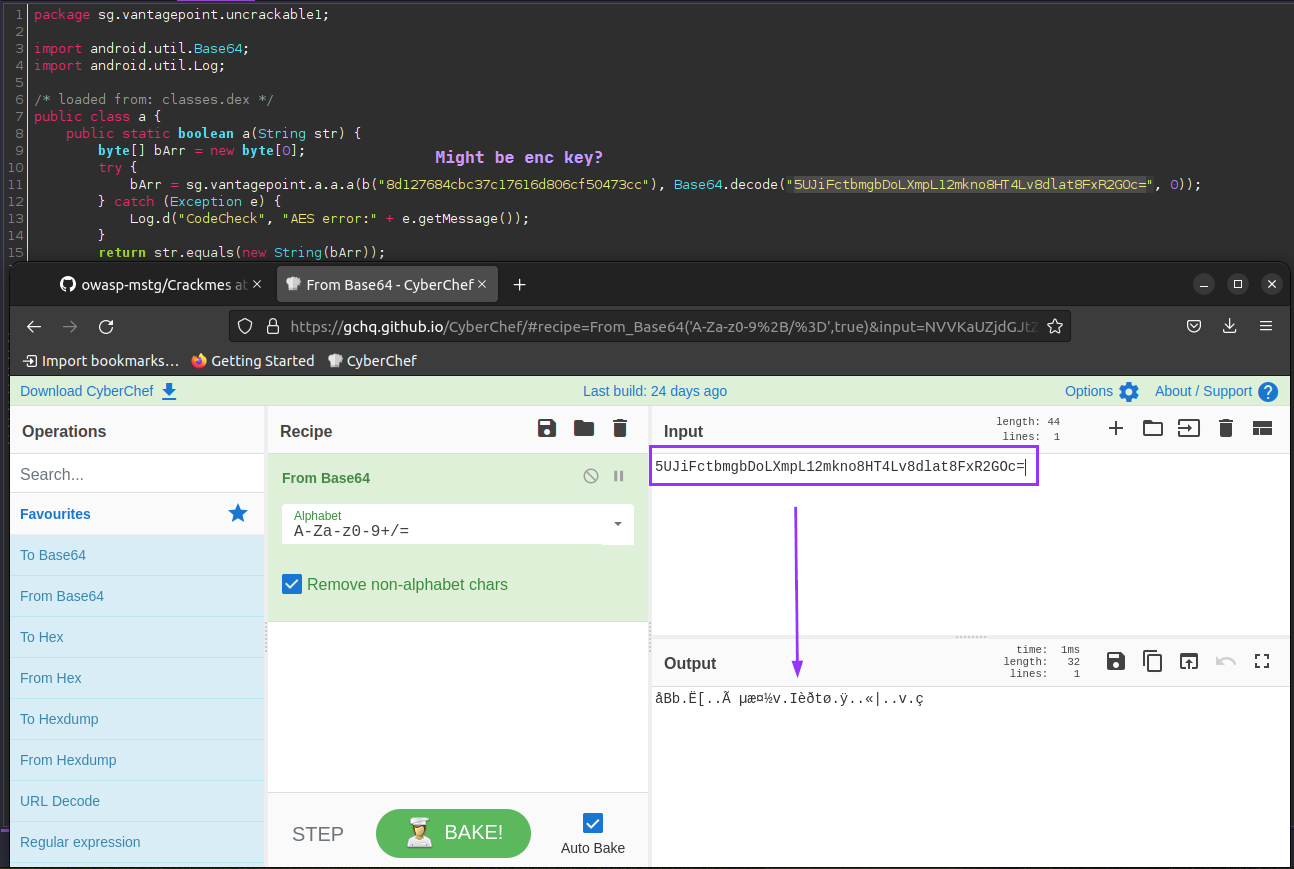
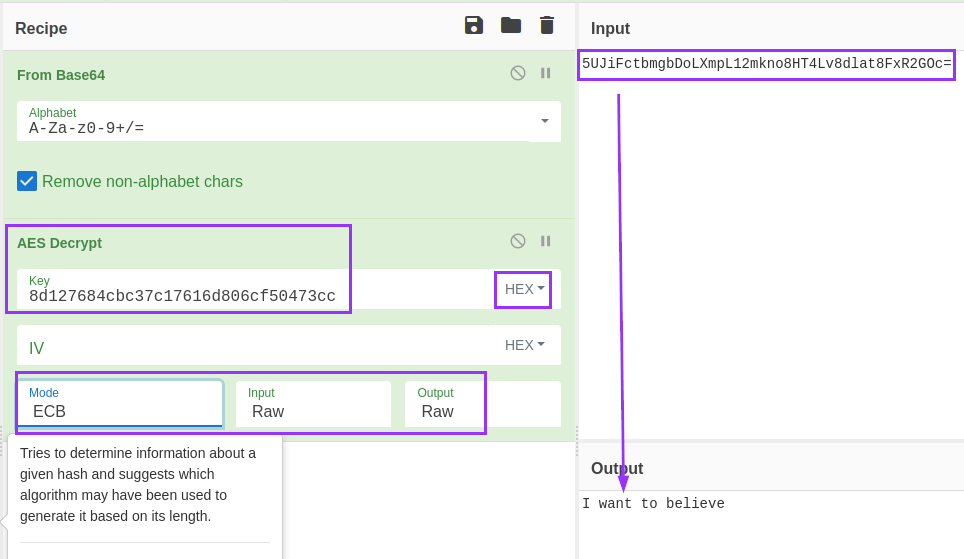
After decoding it from base64, it seems accurate to continue to assume this is an encrypted string. The other string seen in code, the one that starts with “8d127” is likely the decryption key. I test this theory by playing around in CyberChef, and quickly get my answer:
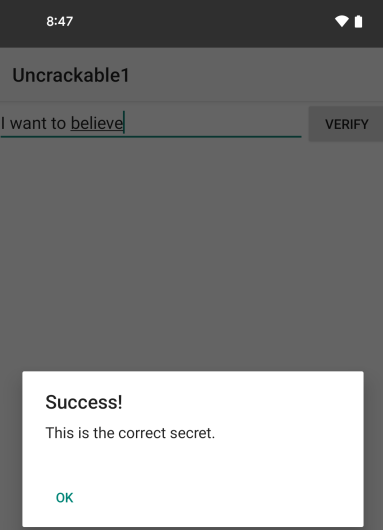
To confirm this is the solution, I enter it into the app, and I am rewarded with a success message:
Dynamic Analysis
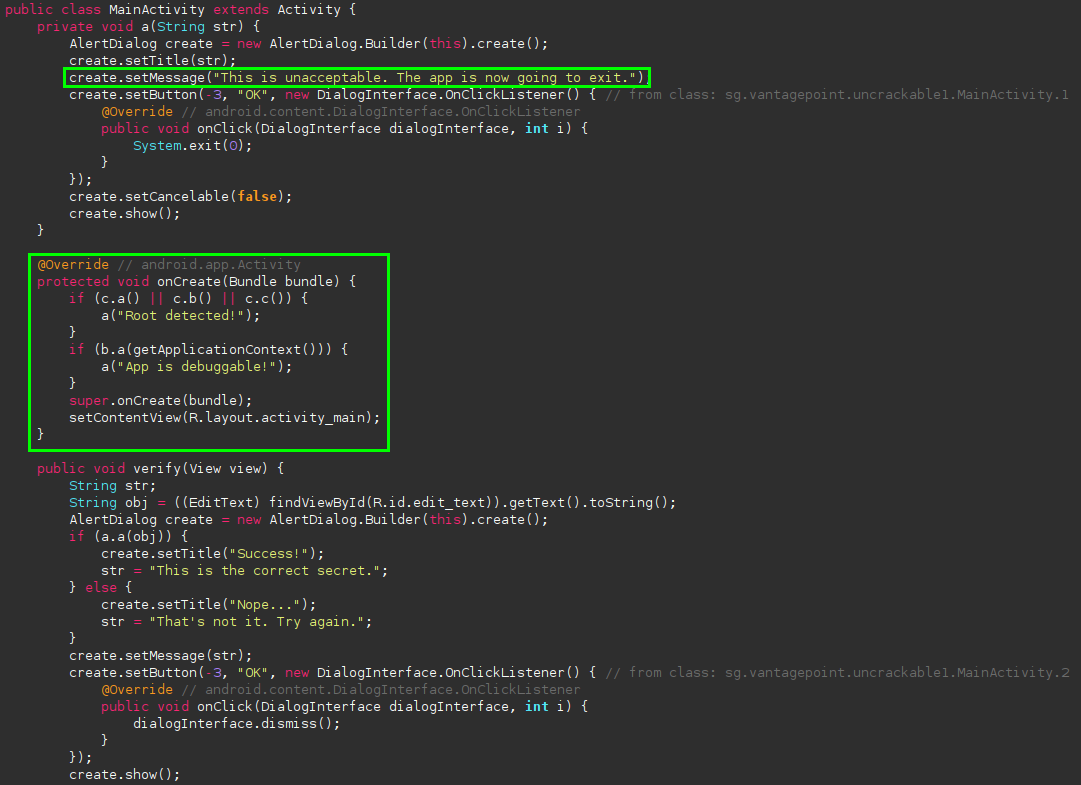
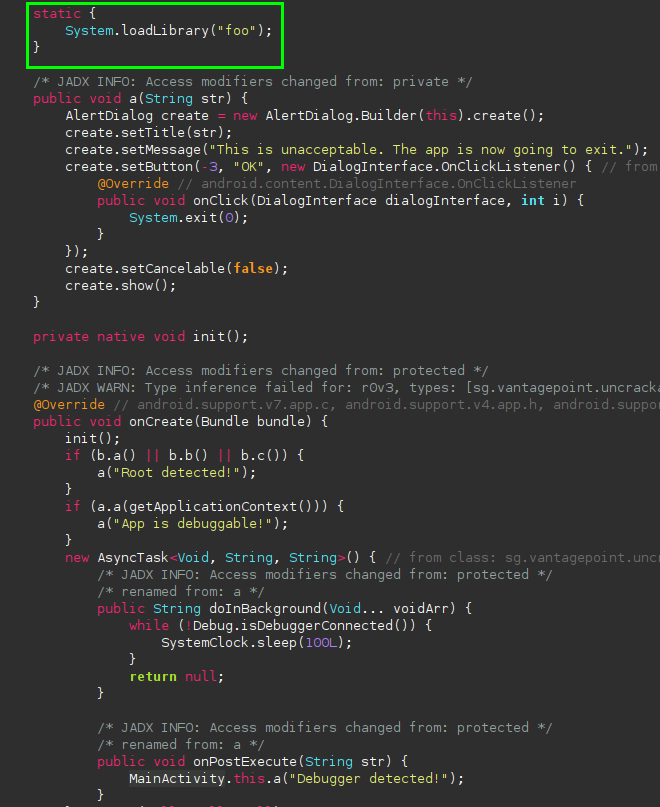
Looking at the app’s entry point, I can see that the app is attempting root detection:
I bypass this by using a module built into Medusa called helpers/anti_debug to bypass most forms of root detection.
After that, I identify exactly what code is actually doing the decryption:
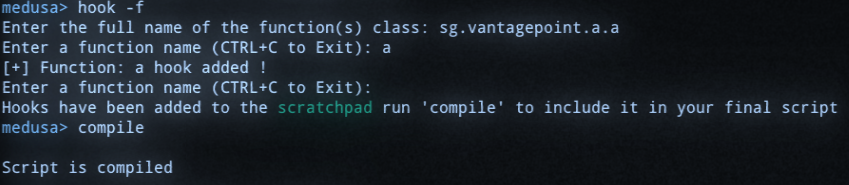
Within Medusa, you can hook classes, methods, or native functions with Frida. The syntax for hooking a specific method in Medusa is as follows:
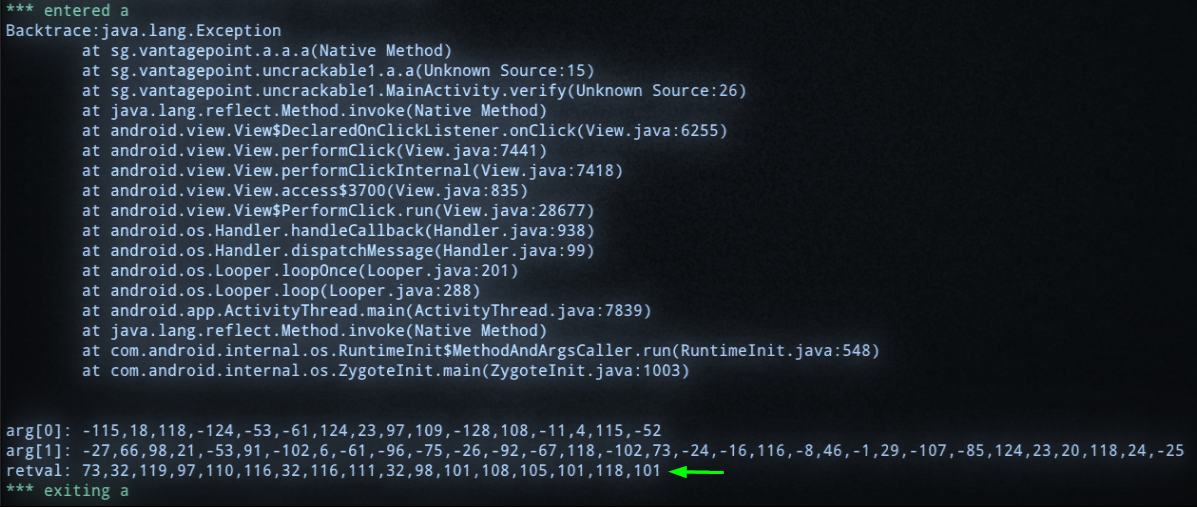
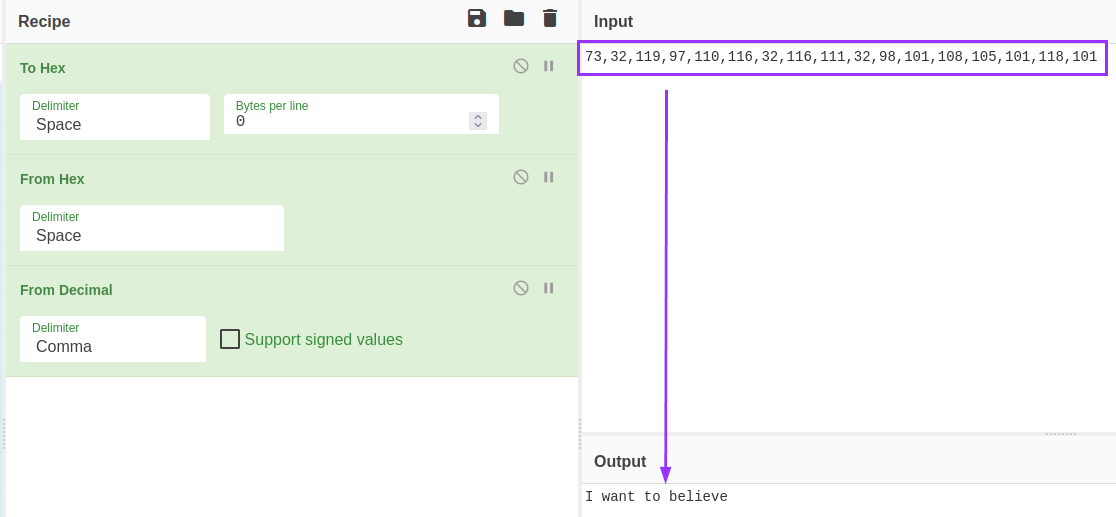
The app is run, and I enter gibberish into the prompt within the app to trigger the comparison. The method spits out what seems to just be just decimal, but CyberChef was able to automatically detect that it was a string. I clicked the magic wand icon and it put the recipie together for me:
Summary
Uncrackable 1 is very simple to solve with both static and dynamic analysis. The dynamic solution took more work to figure out, but it’s worth it to get more comfortable with Frida.
Uncrackable 2
Objective: Find the secret string!
The second uncrackable has the same objective as before, but the difficulty is higher. I was not able to solve it with static analysis, but I will still share the analysis I did, as it plays into the solution via dynamic analysis.
Static Analysis
The app’s main method is doing root detection again, not surprising. However, what’s interesting is that in this version, it’s loading a native library:
There is a class named “CodeCheck” that doesn’t seem to be doing anything other than returning something called “bar”:
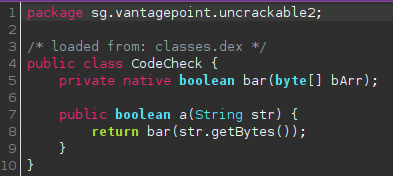
I am going to assume that this is a native method coming from that library seen in code earlier.
Going back to the APK, I use Ubuntu’s built-in archive manager to open the APK like a zip file to see the contents:
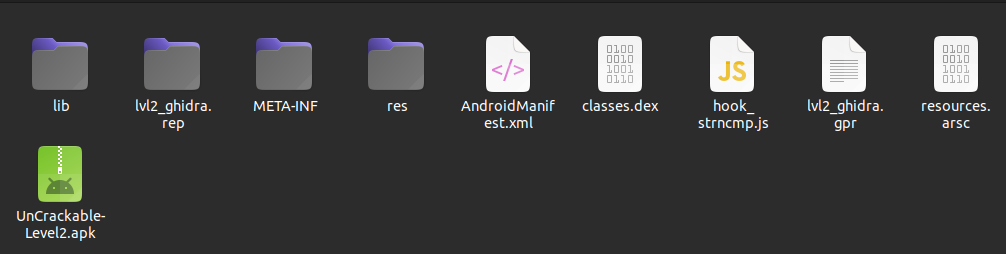
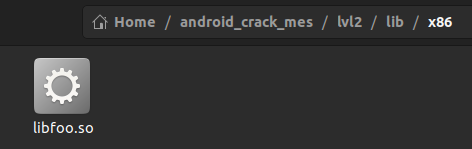
In the lib folder, there are four folders with different CPU architecture names, and each contains a copy of libfoo.so:
I open the library in Ghidra, and find a function that has bar in the name, just like the CodeCheck class referenced:
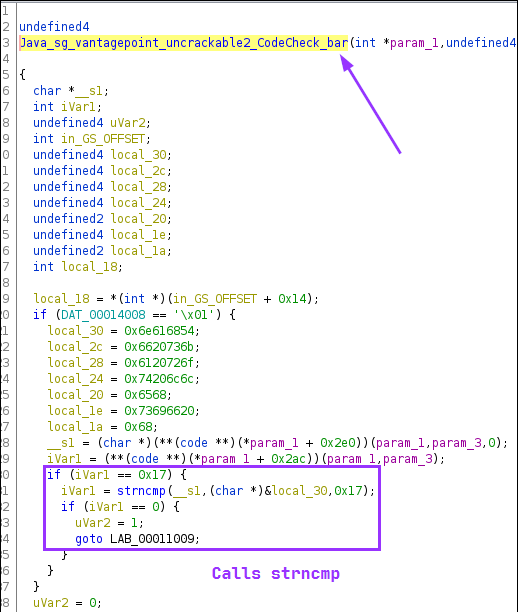
The code highlighed in the purple block is performing a check to see if iVar1 is 0x17 bytes long, or 23 in decimal. If so, it calls strncmp to do a string comparison. It’s safe to assume that the first two arguments are the user input, and the secret, with the third arg just being 0x17 again, the string length.
Dynamic analysis
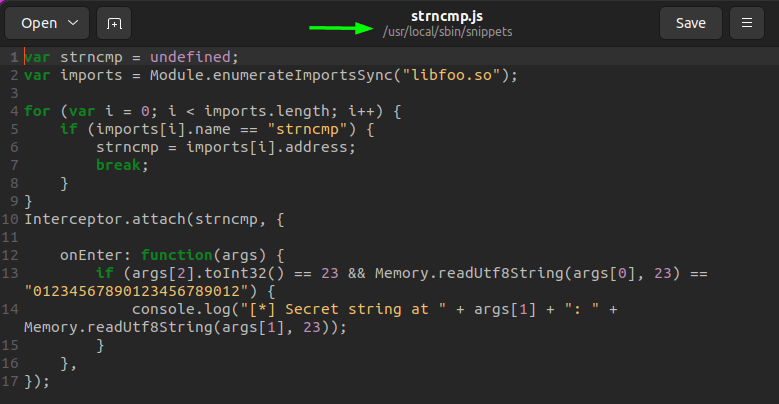
Now that we know what we need to hook, we can go back to Medusa. Included in the snippets folder in Medusa, there is a Frida script called strncmp.js that is able to hook calls to strncmp and dump the arguments to it:
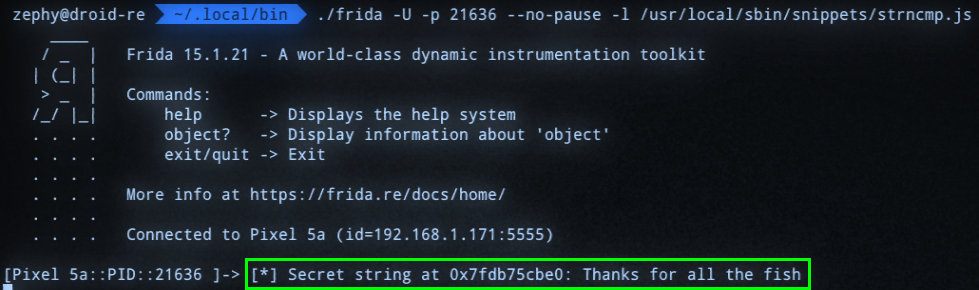
I attempted to import it within Medusa using the correct commands, but for some reason it did not produce results. Instead, I ran the script directly from Frida itself, and got results:
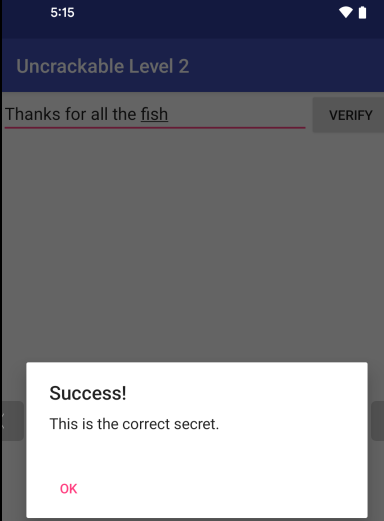
Verifying the solution:
Summary
The difficulty of this challenge was significantly higher for me because it was my first time dealing with native code, and my inexperience with Frida and Frida scripts really hung me up on this one. It took longer than it should have to realize that the issue was with Medusa for some reason, and required running the script straight from Frida. In the end, it was still probably a fairly “simple” solution, and I took some important lessons away from this one.
Appendex
If anyone’s wondering what’s up with my terminal screenshots, no, I am not taking pictures of my screen with my phone. I recently found out about a custom terminal emulator called Cool Retro Term that mimics the look of old-school CRT monitors:
You can install it with sudo apt install cool-retro-term, and there are several themes to explore and tweak.