

Malware Analysis - Wannacry
by purpl3f0x
Intro
It was the middle of May 2017. I was working night shift in a datacenter on the Windows server team. My desk phone rings and it’s a security analyst working for one of the datacenter’s tenants, asking us to immediately apply patches to all their servers for the EternalBlue vulnerability because of the WannaCry outbreak. I explain that we already have arrangements in place and that we don’t just hurl patches onto servers without vetting them first.
As the night goes on I start keeping tabs on the outbreak, reading news articles, looking at the non-stop flow of new information on social media. In particular, I saw lots of posts on Twitter from malware analysts, with lots of screenshots of debuggers, disassemblers, and other things that at the time, I didn’t really recognize. At this point in time I had barely even really started Pentesting With Kali linux and such things were beyond me. But for some reason, on this night in particular, probably due to the sheer size of the outbreak, these Twitter posts piqued my curiosity more than normal. I was astounded by how these people could point out which bits of disassembled code did what. Those posts made me want to learn to reverse engineer malware.
Fast forward about three and a half years and I find myself enrolled in eLearnSecurity’s “Malware Analysis Professional” course. I had shown some mild interest in the course a couple of months prior, but what finally pushed me to enroll was a tiny bit of information I learned from someone in the course; one of the labs walks you through analyzing WannaCry.
I took it as a sign, and enrolled.
Many many people have discussed WannaCry’s internal workings since the initial outbreak. Blogs, youtube videos, you name it.
My analysis will not uncover anything new, or reveal hidden secrets. But I enjoyed ripping this apart so much that I feel like I have to share anyway.
Static Analysis With PeStudio
The first step I take in approaching any unknown, untrusted, or malicious program is to load it up into PeStudio, a static malware-analysis tool made by Winitor.
From here I can derive some basic information about the executable, and form some early opinions on what the malware may be doing.
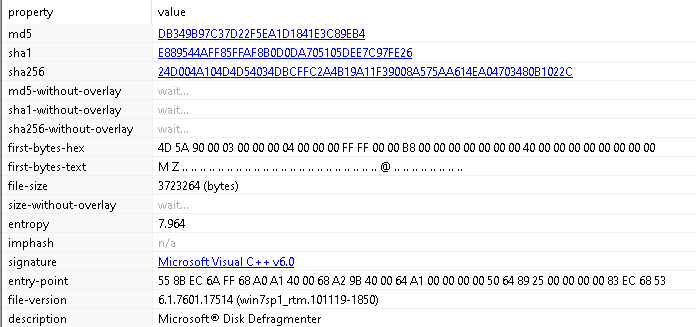
From this first look at the malware, we get some preliminary details such as the hashes, the magic bytes, level of entropy, the complier signature, and more.
The description is a little weird, it’s calling itself Microsoft Disk Defragmenter. Possibly a lazy attempt at avoiding raising suspicion. I found out later that this string is what gets displayed if you look at the process in Task Manager.
I move to the Resources tab in PeStudio and see something unusual:

There is a resource named R, which isn’t normal, and PeStudio is flagging it as an executable. The entropy is also very high at 7.995.
In files, entropy refers to the degree of “randomness”, for lack of a better word. If the entropy is high, it indicates potential attempts at obfuscating the malware. “Packed”, encrypted, or “zipped” files within malware also have very high entropy.
While combing through the “Strings” tab in PeStudio, I find the infamous URL:

This is the URL discovered by malware researcher Marcus Hutchins, which was later discovered to be the “kill switch” when he registered the domain and noticed that the outbreak began to shut down.
Continuing through the strings, I see this:

This indicates that this malware may be employing code that has been zipped and comes with a built-in unzipper.
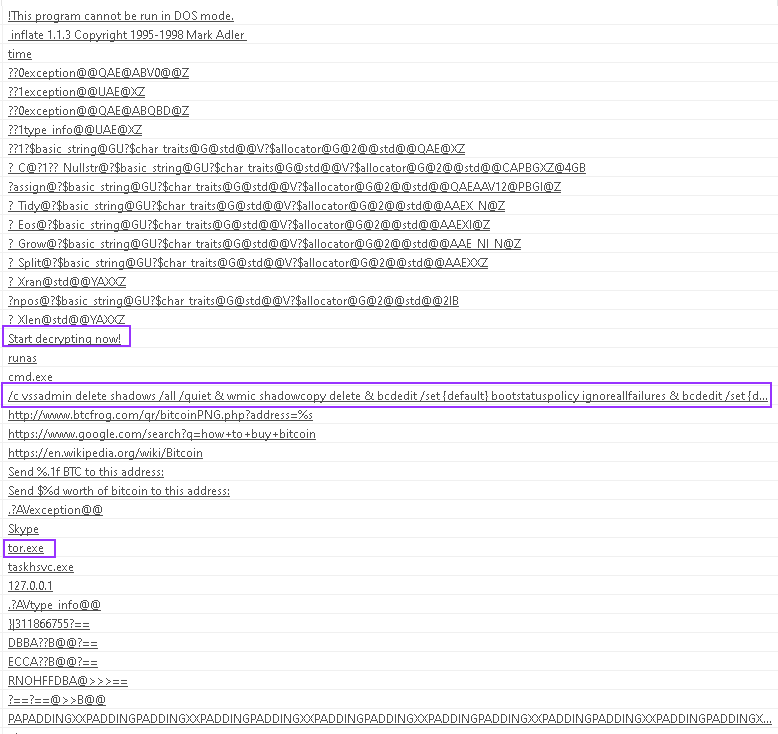
Pushing deeper into the mess of strings, I find some questionable strings that look like commands:
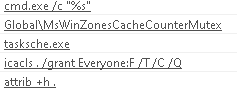
There’s some references to cmd.exe, icacls to change permissions on something, and tasksche.exe, indicating either a timed task or maybe some form of persistence.
My analysis then moved on to look at some of the DLLs being loaded by the malware, and the API calls being made to those DLLs:
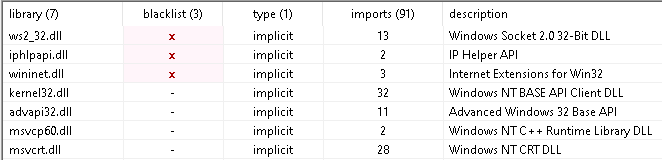
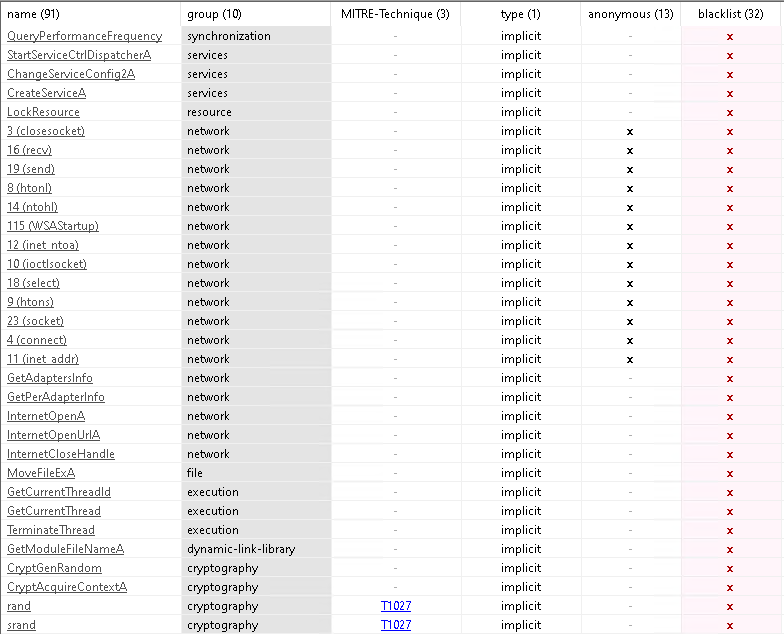
PeStudio marks suspicious activity with red x’s. This doesn’t necessarily mean it’s malicious, rather, it draws your attention to it to indicate that further analysis should be caried out.
In this case we see some questionable calls to some networking functions, as well as some cryptographic functions towards the bottom of the “Imports” page.
Dynamic Analysis With x64Dbg
x64Dbg is a Windows debugger that supports both x86 and x64, and has a familiar interface that should be easy to learn for anyone who has used Immunity Debugger. x64Dbg has some features that Immunity either doesn’t have, or it improves upon. It’s useful for analyzing malware.
I load wannacry into x64Dbg and examine the primary executable. Inside, I see the kill-switch URL being loaded into a register, likely being passed as argument to the following API call to InternetOpenUrlA:
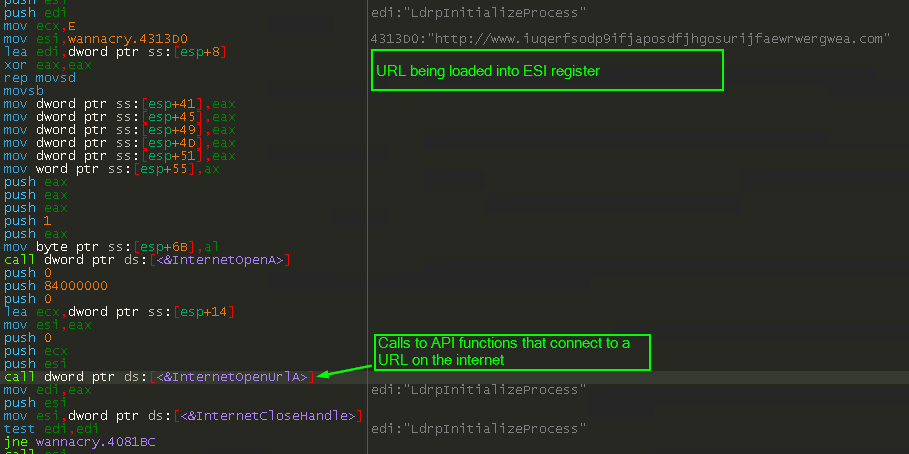
InternetOpenUrlA will return a handle and store it in EAX if the request to the URL was successful.
Immediately below the call to the API, we see mov edi, eax. This will move the handle ID into EDI, which is used a few instructions down at the test edi, edi. This will perform a bit-wise AND against the two arguments, which in this case, is just EDI being AND‘d against itself.
If the result of the test operation is 0, the ZF flag is set to 1.
If the result of the test operation is anything but 0, the ZF flag is set to 0.
In the case of the connection to the URL failing, the test will produce a 0. Microsoft’s documentation on InternetOpenUrlA says that if the attempt to connect to the provided URL fails, the API returns NULL.

This means that if the connection succeeds, we should have something other than a 0 in EDI, so the test will set the ZF flag to 0.
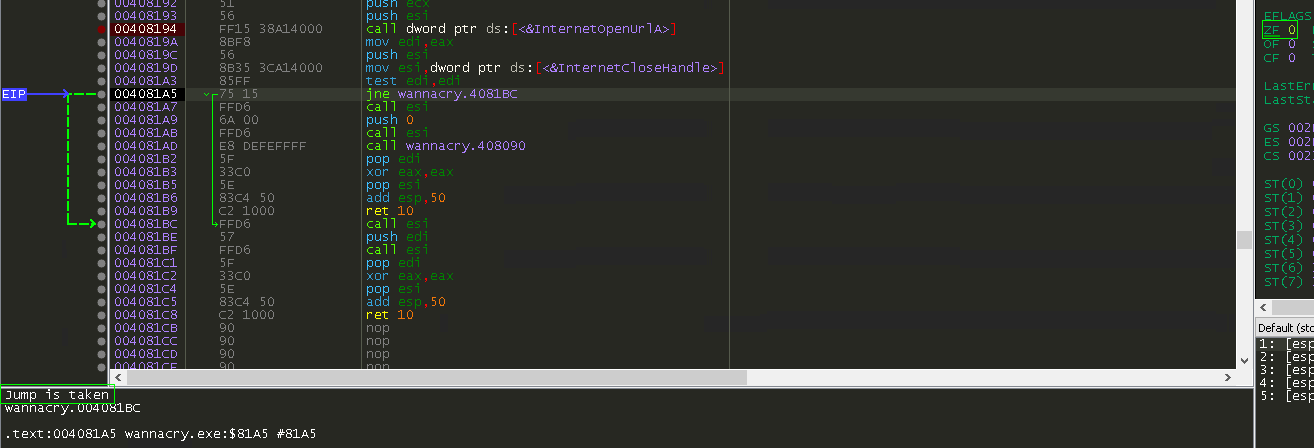
Just below the test we see jne wannacry.4081BC. This is a conditional jump that will occur if the result of the previous operation is NOT equal. To determine this, the instruction evaluates the ZF flag. If the ZF flag is set to 1, the last operation was equal, and the jump is not made. If the ZF flag is 0, then the last operation was not equal, and the jump is taken. This instruction will jump to code located at address 0x4081BC if the ZF flag is 1. We can assume that this is the code that terminates the malware if the kill-switch domain is live and the victim machine has an active internet connection that successfully resolves the domain.
This action takes place not far from the entry point of the malware, meaning that the kill-switch will trigger before it does anything.
I set a breakpoint at the call to InternetOpenUrlA and then stepped over the call and examined EAX:

EAX is a non-zero value. That is because I deliberately did this analysis on a VM that had an internet connection, because I wanted to see this kill-switch in action.
If we step thru down to the jne instruction, x64Dbg kindly highlights that the jump is taken and shows us where the jump goes:
I follow this code for a little while and then find this:

This validates that the kill-switch has worked as intended and directed the program to exit without doing anything further.
Investigating The Resources
When doing malware analysis you may find yourself going back and forth between static and dynamic analysis techniques, and it seems to be the natural flow of things.
Recall that earlier we saw that there was a “resource” named R in this binary with high entropy, and that this binary made a vague reference to unzipping software.
Using a tool called Resource Hacker, we can view, and even extract this “resource”.
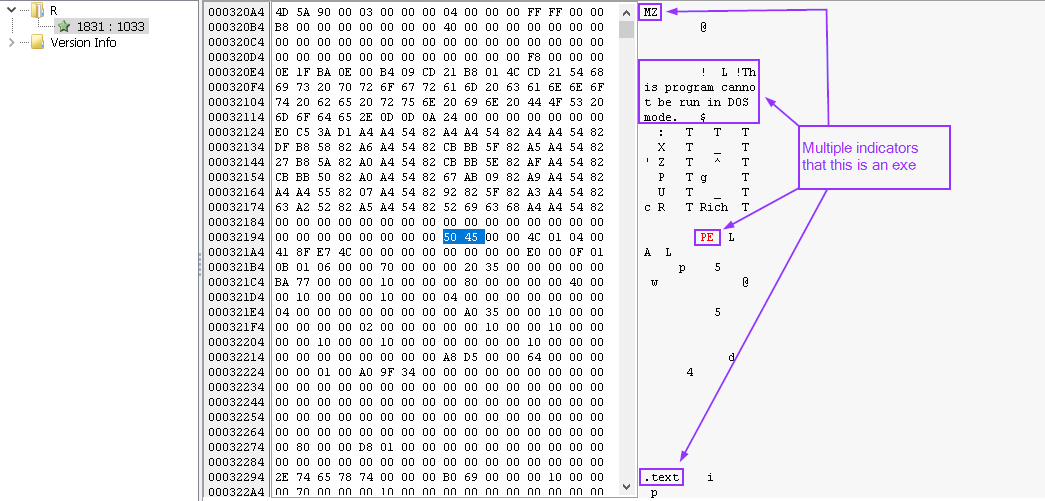
During this analysis, we see that this resource is an executable:
To do deeper analysis on this, we can save it as a seperate file:

Then, I take this newly created file, and circle back to PeStudio and have a look at it:

Again, this executable seems to have an innocent-looking description. Ignoring this and looking at the “Resources” tab in PeStudio, there is another suspicious indicator:

This executable almost definitely contains a zipped file. But to be sure, I take a look at the magic bytes and then look them up:


At this point we confirm it’s a zip file. Using Resource Hacker again, I pull this out and save it as a stand-alone fil and name it .zip.
I try to open it up but I cannot:
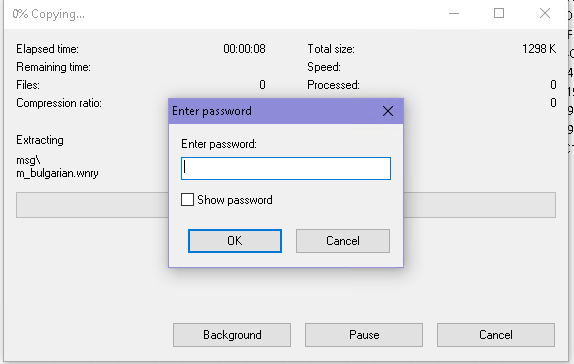
It requires a password. This password is certainly inside the binary so it can unzip this package and use what’s inside.
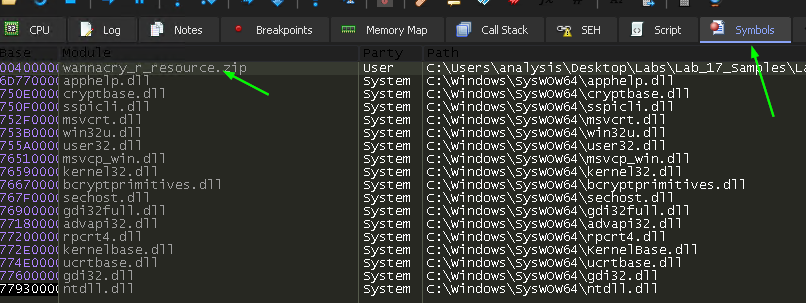
To find it, we go back to x64Dbg again, but this time I’m opening the extracted “R” resource found earlier, not the original WannaCry.exe binary.
Navigating to the “Symbols” tab, we find the zipped file:
I double-click on the name to open this part of the binary in the debugger pane, and then right-click in some empty space, and select the following option:
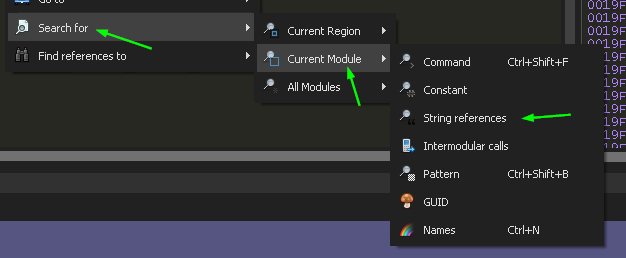
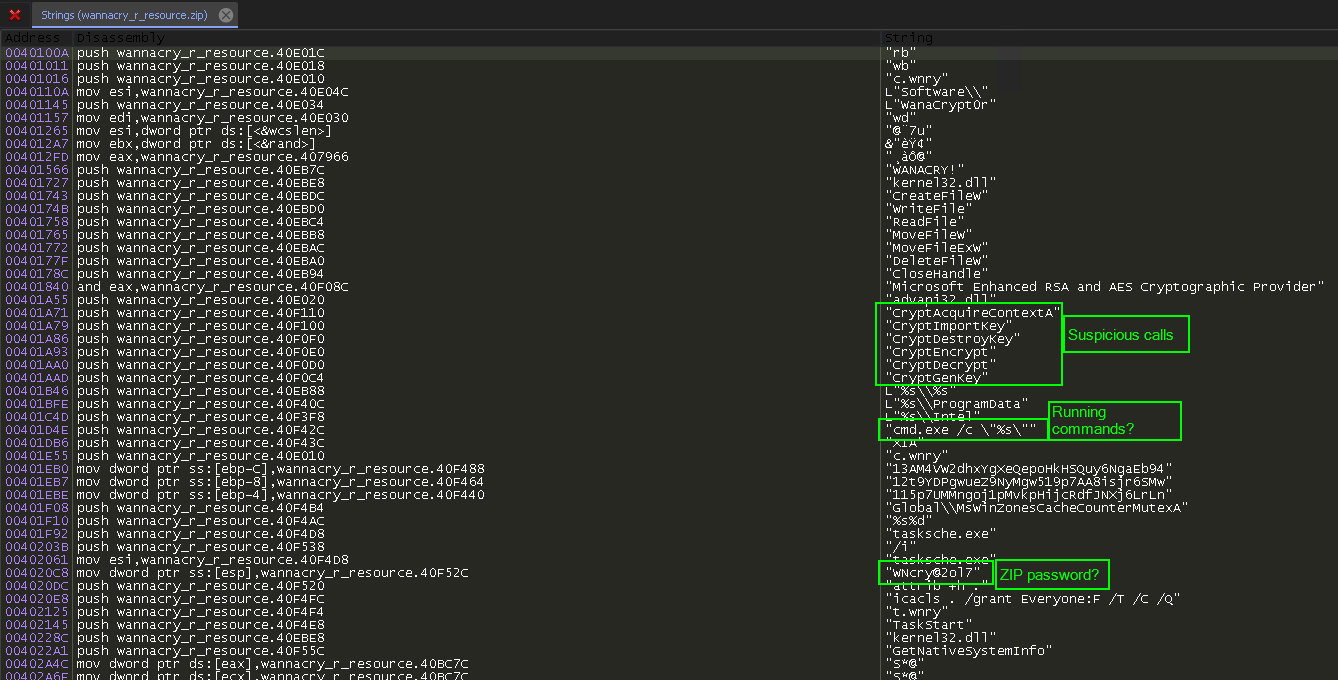
This shows us the strings found in the binary. There are some references to Cryptography APIs here, and what looks like a password:
As a side note, it was around this time that I discovered that pressing the “G” key while in the assembly pane in x64Dbg will do this:
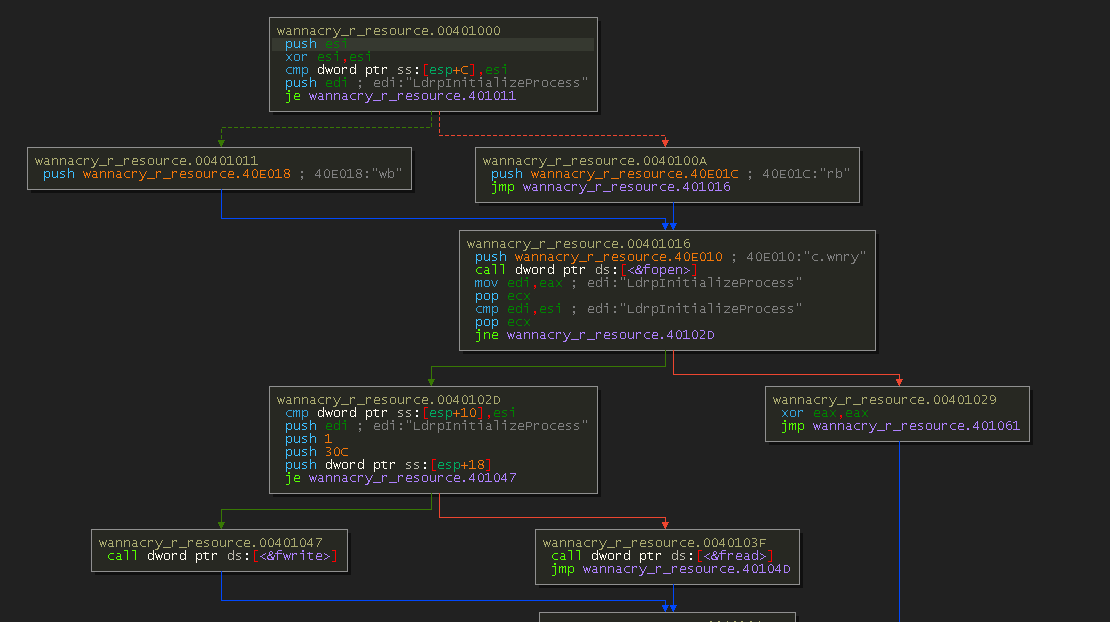
It presents an IDA-like flow chart of code execution.
Getting back on track, we saw something a moment ago that looks like a password. We could just run with that, or we can keep using x64Dbg to help us confirm it.
I right-click inside empty space again and select “Intermodular Calls”:
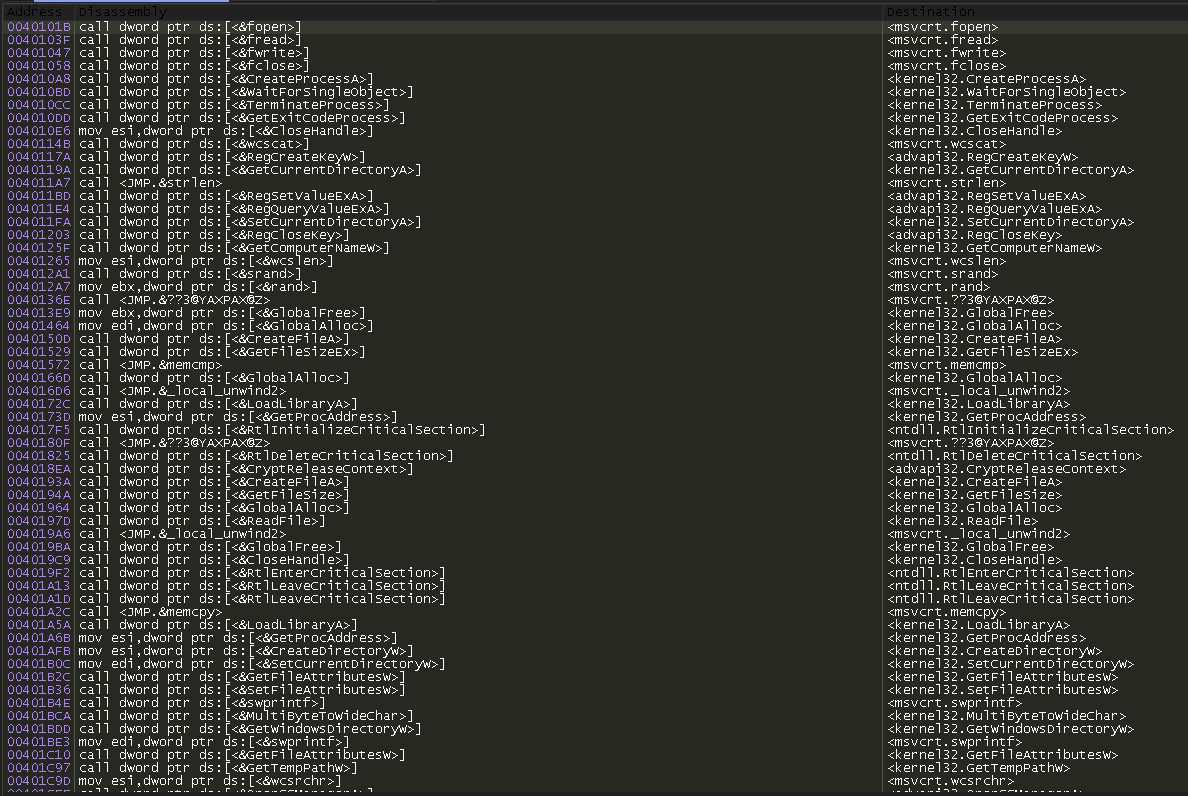
This is a lot to try to go through, but there is a search function we can use. We know there is a “resource” inside this binary that is zipped and needs to be unzipped, so we look for any API calls referencing “resource”:

Perfect. I double-click the first on the list, FindResourceA, and I am directed to this block of code:
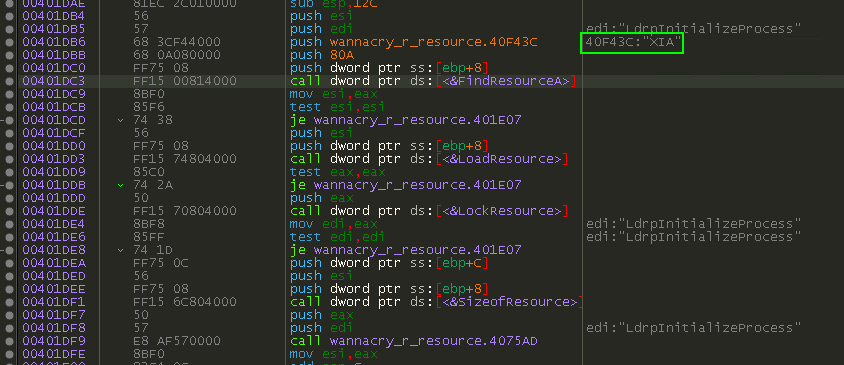
Recall that in PeStudio earlier, we saw a resource named “XIA”, and it was that resource that was identified as being the PKZIP format. We’ve found the code that is locating this resource so it can perform other tasks with it.
I navigate back to the first instruction of this function, because x64Dbg has the ability to back-trace function calls to see what code called this function.


There is only one module that calls this function:

Double-clicking on it leads to this bit of code:

This helps solidify the theory that this is the password. I go back to the extracted .zip file and try again to open it, but this time with the password. It opens, and I get to see the file contents:
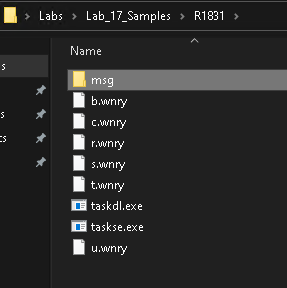
There are lots of files here, most of which have a custom file extension that is unique to this malware. Inside of the msg folder there are more .wnry files but they all begin with the name of different languages. This is probably the ransom note, translated into multiple languages. I test this theory by opening m_english.wnry in a hex editor:

The magic bytes essentially give it away. I rename the file to m_english.rtf and open it:

This is the ransom note delivered to the victim after successful infection.
I continue down the list and start analyzing each file I see, starting with b.wnry:
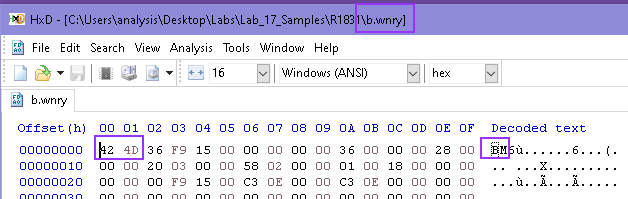
I looked up the magic bytes for this file, and it comes back as being a bitmap image file. As with the previous file, I rename this to b.bmp and open it:
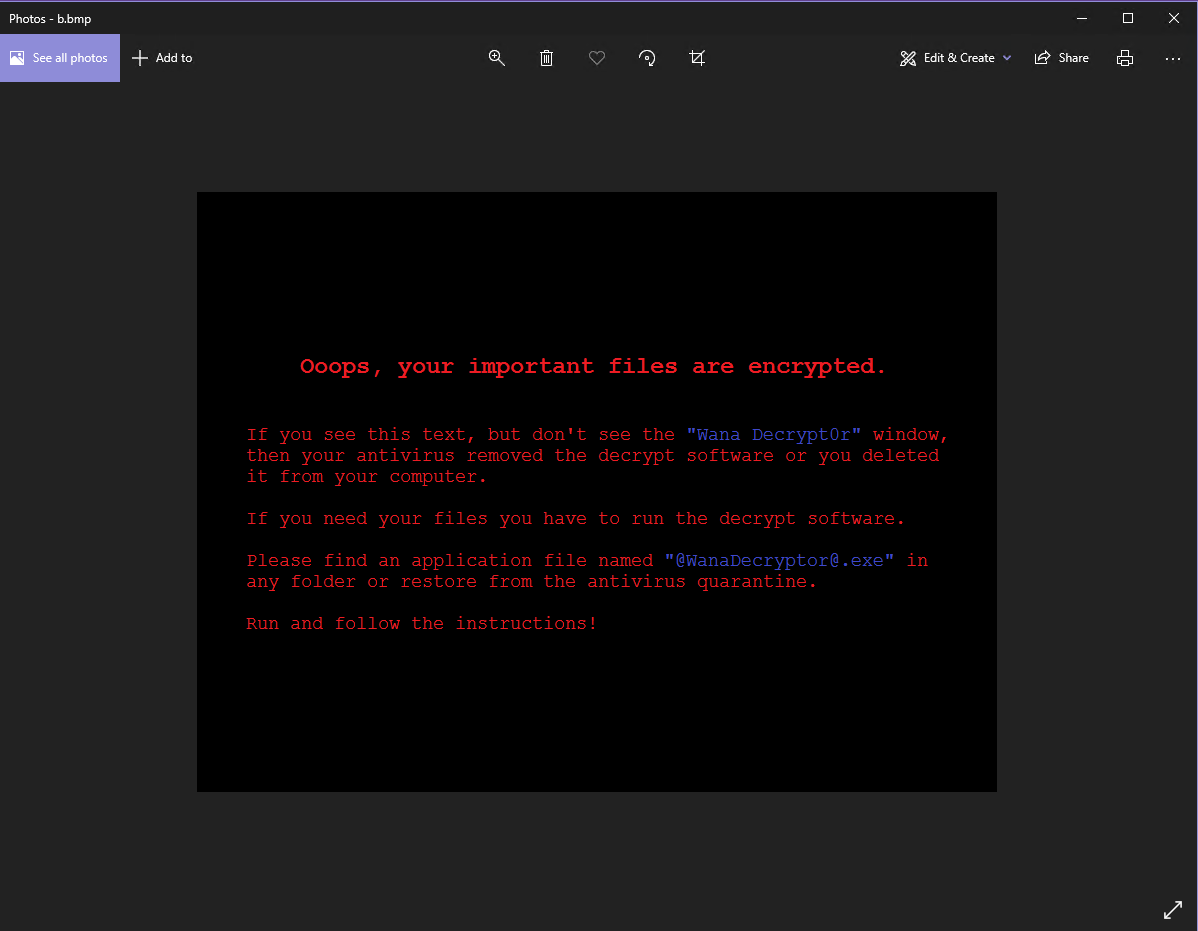
I believe this image is set as your desktop background after successful infection.
Moving on, I open c.wnry in a hex editor and see something interesting:

The text makes some references to .onion addresses and the TOR project, specifically, a URL to a zip file, probably a TOR download.
Next on the list is r.wnry. The hex editor doesn’t show any magic bytes, it only shows text, so I renamed the file to r.txt and opened it:
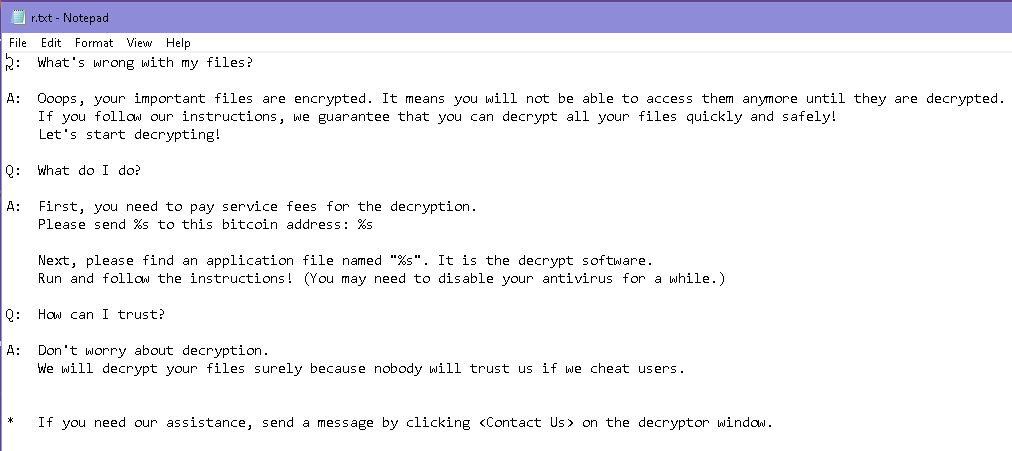
Looks like it’s an additional help page explaining things to the victim.
Moving on to s.wnry:

Another zipped file. Luckily, this one does not have a password, so I can just rename it to s.zip and open it:

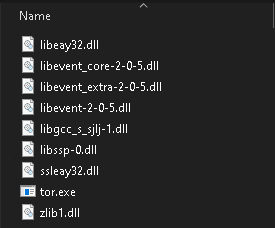
It appears to be the TOR browser. I opened up the directory named TOR and found some files that seem to prove this theory:
Looking at the next file, t.wnry, it has a custom file header of “WANACRY!” and then nonsensical text. This is probably some kind of encoded or encrypted file that the primary executable understands how to read and potentially execute.

The last one to analyze is u.wnry, and this one is a little more interesting than the others.

Judging by the magic bytes, it’s another .exe file, so I rename it to u.exe and open it up in PeStudio:
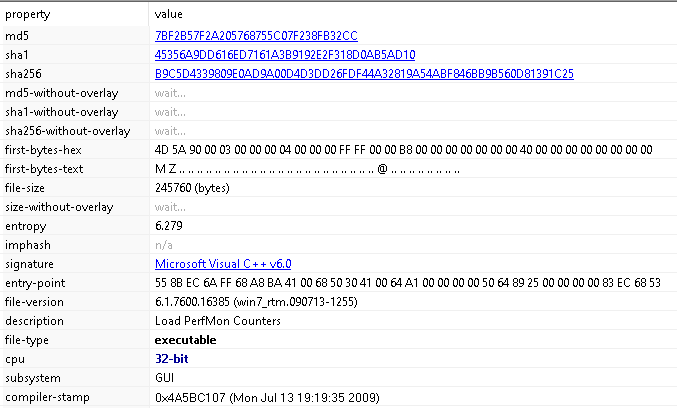
This one describes itself as “Load PerfMon Counters”, another odd attempt at looking harmless. Moving to the “Imports” section, there are more calls to Windows networking APIs:

It is after I examine the strings that it starts to become more obvious what this may be:
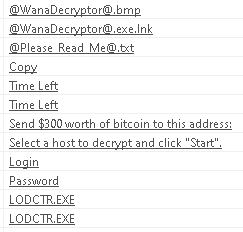

This appears to be the decryptor that is used by victims after making payment. It also sheds a little light on why there are links to TOR and why TOR is packaged into the malware, as it asks the victim to make sure that their ISP is not blocking TOR if the decryptor fails to validate they paid the ransom.
But where’s the encryption?
Unfortunately the lab exercise didn’t go over using the debugger or another other tools to watch the encryption routine happen. Instead, the course goes in the direction of standing up lots of various monitoring tools, and then just letting the malware run freely. I chose not to do this because we already know what this malware does, and looking at ProcMon logs of all the files and registry keys touched, and Wireshark PCAPs showing the network traffic doesn’t reveal anything that we don’t already know. The context clues found in our analysis teaches us enough; there are calls to cryptographic APIs, there are ransom notes that demand bitcoin to get files back, and a decryption executable. Eventually I would like to re-visit and learn to identify the encryption process in-action in a debugger, but that will have to wait for another time.
Execution Flowchart
Summary
This was a long and very involved process, but one that I enjoyed the entire time. The outbreak of WannaCry was the event that inspired me to want to learn malware reverse engineering, and to get the chance to analyze WannaCry itself was one that I couldn’t pass up, and it was extremely satisfying to get to go through it all.
References and Resources
tags: Malware Analysis